Table of Contents
Finally, we are ready to talk about graphics programming.
Rather than seeing just boring text output, we get to see some fancier and more pleasing results!
Here is an introduction to the principles of graphics programming, using Java Swing. It’s primarily focused on simple drawing, as opposed to using the full power of Swing.
We’ll go into much more details about Java Swing programming in the next section.
Introduction
What is Graphical Programming?
It’s using a graphical user interface (GUI) rather than a command line style. GUI programs are what most people want to see these days.
How you write GUI programs is very different from how you write conventional programs. The approach is to use events to drive the program — event-driven programming.
AWT
In Java 1.0, the language provided a set of classes that were intended to allow you to build GUI programs in a platform-independent way. This was the AWT, variously called:
- The Abstract Window Toolkit
- “The Alternative Window Toolkit”
- “The Awful Window Toolkit”
The AWT is a platform-independent windowing/graphics toolkit, and exists in library of classes in package java.awt.
AWT Shortcomings
Unfortunately, there were a number of shortcomings to the AWT. Since the AWT relied on the underlying windowing system on each platform, it:
- Tended to be a least common denominator approach; if something couldn’t be done on one platform, then it couldn’t be done on any platform.
- AWT did not have the capabilities that were considered normal on Windows and Mac platforms, because of its least common denominator approach, so Java GUIs didn’t look or behave as well as native GUIs on those platforms.
- For each AWT component, Java relied on a native windowing system peer component, that handled most of the work. This became a restriction, and also had major performance and resource consumption problems for any non-trivial GUI program.
- Because each platform’s implementation depended on the underlying windowing system for that platform, each platform had its own set of bugs, which drove Java programmers crazy.
- “Write once, run anywhere.” became “Write once, debug everywhere.“
JFC/Swing
So, JDK 1.2 introduced a new, far more functional and flexible set of classes called JFC (Java Foundation Classes). A subset of these classes is known as Swing, which solves the above problems pretty well. It is now possible (and relatively easy) to create a good-looking and usable GUI for your programs that is portable across Java platforms.
We will get into more details on JFC and Swing later on in the course.
It is important to note that JFC/Swing is not a replacement for everything in the AWT. Rather, many of the AWT classes are used heavily when you use JFC/Swing. Some classes in JFC/Swing are replacements for some classes in the AWT (JFrame for Frame, JApplet for Applet, etc.), but other classes in the AWT are retained and are still well used.
The Swing Package
Today, the Swing classes may be found in the javax.swing package.
Note the javax, not java. This is because the Java developers decided to place a number of packages — Swing among them — in what they term “Java extension packages” (hence the ‘x’).
There’s some history here:
- Swing was developed primarily for JDK 1.2 and beyond.
- Before JDK 1.2 Beta3, the swing classes were in a Sun Microsystems private Java package: com.sun.java.swing
- But then Sun moved it into a different package, which is part of the Java Standard Extensions: javax.swing
In general, I wouldn’t bother about any version of Java before 1.3.x; more recent versions are much more stable, and support more features.
Frames
We are all familiar with the use of the term window to describe a rectangular area on a screen. Most of these windows have a number of decorations such as:
- A title bar
- A border
- A menu bar
- A tool bar
- etc.
Java has a class JWindow, which you might think would be what you’d need to create such a window. However, Java’s JWindow doesn’t provide any of these window decorations.
Here’s a not-very-useful example of a JWindow:
package swingExamples;

import javax.swing.JWindow;

public class WindowExample extends JWindow
{
  public WindowExample()
  {
    setSize(300, 200);
  }

  public static void main(String[] args)
  {
    WindowExample window = new WindowExample();
    window.setVisible(true);
  }
}
which produces the absolutely fascinating output window:

Instead, to create a window of your own, in Java, you have to use a class JFrame (not JWindow). The result is called a frame in Java.
Here’s where we start to learn how to create frames…
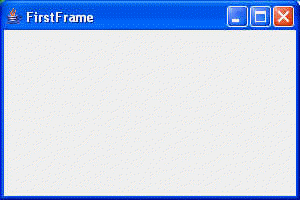
Your First Frame
Here’s some code to show you how to create a very simple frame, using the Swing JFrame class:
package swingExamples;

import javax.swing.JFrame;

public class FirstFrame1 extends JFrame
{
  public FirstFrame1()
  {
    setTitle("FirstFrame");
    setSize(300, 200);
  }

  public static void main(String[] args)
  {
    FirstFrame1 frame = new FirstFrame1();
    frame.setVisible(true);
  }
}
Or we can move the main entry point out into its own class:
package swingExamples;

import javax.swing.JFrame;

class FirstFrame2 extends JFrame
{
  public FirstFrame2()
  {
    setTitle("FirstFrame");
    setSize(300, 200);
  }
}

public class FirstTest
{
  public static void main(String[] args)
  {
    FirstFrame2 frame = new FirstFrame2();
    frame.setVisible(true);
  }
}
Both of which produce the wonderfully informative window below:
Sizing a Frame
If we had omitted the line:
setSize(300, 200);
which specifies the width (300) and height (200) of the frame, in units of pixels, we would have seen the following:

This tells us that the default width and height are both 0. The fact that the title bar is displayed automatically ensures that something, at least, is visible.
It is a common mistake to forget to size the frame properly, and then wonder where the frame went when you run the program!
Positioning a Frame
If you don’t specify where the frame is to be placed on the screen, you will find that it will be displayed with its upper left corner at the upper left of your screen. In the previous case, the tiny frame looked like this on my screen:

Where it was at the upper left of my screen.
We can specify the position of a frame. Here’s one way to do it:
package swingExamples;

import javax.swing.JFrame;

public class FirstFrameLocated extends JFrame
{
  public FirstFrameLocated()
  {
    setTitle("FirstFrame");
    setSize(300, 200);
    setLocation(100, 200);
  }

  public static void main(String[] args)
  {
    FirstFrameLocated frame = new FirstFrameLocated();
    frame.setVisible(true);
  }
}
This specifies that the upper left corner of the frame will be located 100 pixels (x coordinate) to the right, and 200 pixels (y coordinate) down from the upper left corner of the screen.
Another way of doing this is to combine the sizing and positioning of the frame as follows:
package swingExamples;

import javax.swing.JFrame;

public class FirstFrameBounded extends JFrame
{
  public FirstFrameBounded()
  {
    setTitle("FirstFrame");
    setBounds(100, 200, 300, 200);
  }

  public static void main(String[] args)
  {
    FirstFrameBounded frame = new FirstFrameBounded();
    frame.setVisible(true);
  }
}
Exiting a Program
If you were trying out the above Java programs, and were particularly observant while you ran the programs, you may have noticed a peculiarity when you tried to close the frame (i.e., clicked on the ‘x‘ on the right side of the title bar, or clicked on the icon on the left side of the title bar, and selected Close on the resulting menu).
When you close the frame, it becomes invisible, but the program is still running! Why is this?
It turns out that you can choose what a JFrame should do when you close it. The choices are:
| Constant | Defined | Description |
|---|---|---|
DO_NOTHING_ON_CLOSE | javax.swing.WindowConstants | Don’t do anything; require the program to handle the operation in the windowClosing method of a registered WindowListener object. |
HIDE_ON_CLOSE(the default) | javax.swing.WindowConstants | Automatically hide the frame after invoking any registered WindowListener objects. |
DISPOSE_ON_CLOSE | javax.swing.WindowConstants | Automatically hide and dispose the frame after invoking any registered
WindowListener objects. |
EXIT_ON_CLOSE | javax.swing.JFrameand javax.swing.WindowConstants | Exit the application using the System.exit method. Use this only in applications. |
For the moment, don’t worry about those references to windowClosing method and WindowListener objects. We’ll get to those when we talk about Java events.
So, to specify that closing the frame should also exit the program, you have to specify it explicitly:
package swingExamples;

import javax.swing.JFrame;

public class ExitingFrame extends JFrame
{
  public ExitingFrame()
  {
    setTitle("ExitingFrame");
    setBounds(100, 200, 300, 200);
    setDefaultCloseOperation(EXIT_ON_CLOSE);
  }

  public static void main(String[] args)
  {
    ExitingFrame frame = new ExitingFrame();
    frame.setVisible(true);
  }
}
which produces this equally stunning result:

But at least you can tell it to exit!
A Centered Frame
Let’s create a window with
- a specific computed size
- centered within the screen, and
- with a different icon in the title bar:
package swingExamples;

import java.awt.Dimension;
import java.awt.Image;
import java.awt.Toolkit;

import javax.swing.JFrame;

class CenteredFrame extends JFrame
{
  public CenteredFrame()
  {
    setTitle("Centered Frame");
    setDefaultCloseOperation(EXIT_ON_CLOSE);
    Toolkit tk = Toolkit.getDefaultToolkit();
    Dimension dim = tk.getScreenSize();
    int screenHeight = dim.height;
    int screenWidth  = dim.width;
    setSize(screenWidth/2, screenHeight/2);
    setLocation(screenWidth/4, screenHeight/4);
    Image image = tk.getImage("icon.gif");
    setIconImage(image);
  }

  public static void main(String[] args)
  {
    CenteredFrame frame = new CenteredFrame();
    frame.setVisible(true);
  }
}
Which produces the following fascinating output. The frame will be centered horizontally and vertically on the screen.
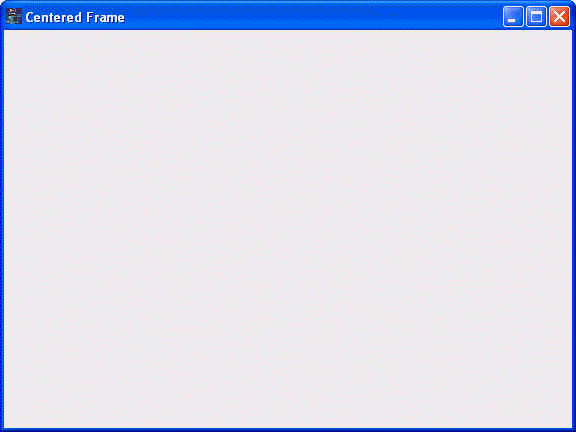
Clearly, we need to start placing some content into this frame to make it more interesting.
Onward!