|
|
|
|
Once you've downloaded the BDK and unzipped it, you can try running the BeanBox tool. The BeanBox is a simple "IDE" for manipulating JavaBeans, and constructing apps from them. In the subdirectory beanbox, you will find two files:
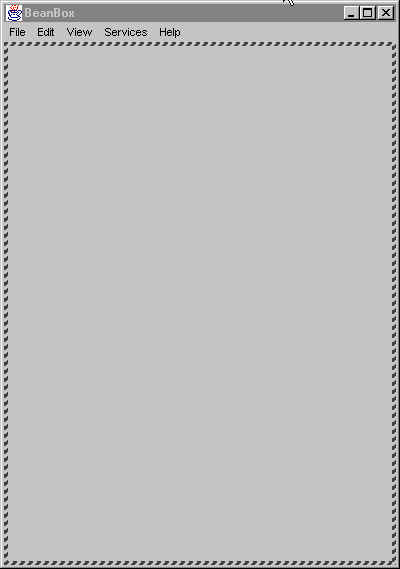
Invoke the appropriate one to run the BeanBox. The BeanBox WindowsWhen it starts, you will see three (four in BDK 1.1) windows appear:
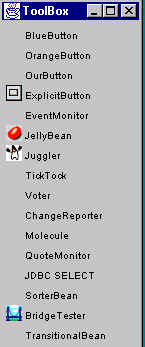
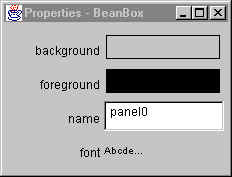
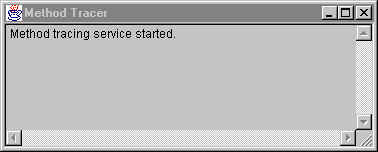
The ToolBox WindowThe ToolBox window shows a list of the beans available for use by the BeanBox. To use one of these beans, you click on the bean, and drop it into the BeanBox window. The BeanBox WindowThe BeanBox window is where you visually place beans, and "connect them together", by defining how they interact with other beans. The BeanBox is actually an instance of the BeanBox bean -- you can see its properties displayed above. You select a bean in the BeanBox window simply by clicking on the bean. The selected bean is depicted by a hatched border surrounding it. The Properties window shows the properties for the selected bean. The Properties WindowThe Properties window shows the properties for the bean currently selected in the BeanBox window. The Method Tracer Window (new in BDK 1.1)In BDK 1.1, the BeanBox includes some example BeanContext services, one of which is a service for providing simple method tracing and debug statement logging. By writing beans in a specific way, you can incorporate simplistic debugging into your bean. Note that this may not work properly on all VMs. The logic in the trace method depends upon formatting of the message associated with an exception and this is not standardized. It is simply intended to demonstrate the registration, request and utilization of a BeanContext service. Adding a Bean to the ToolBoxWhen the BeanBox starts, it automatically loads the ToolBox with all the beans it finds within the JAR files located in the jars directory. If you have a set of beans, place them into one or more JAR files, and copy those JAR files into the jars subdirectory. You can also load beans into the BeanBox by using the File->LoadJar ... menu item, and choosing the appropriate JAR file using a file dialog. Dropping a Bean into the BeanBoxYou can drop a bean into the BeanBox window as follows:
When you do this, the bean instance is selected (as shown by the hatched border), and the Properties window shows the bean's properties. Editing Bean PropertiesThe Properties window displays a selected bean's properties. Each property shows:
A property value may be changed by clicking on the value of that property in the Property window. This activates the property's Property Editor. (If the form of the property value is text or choice, then the value is edited directly in the Property window.) Saving and Restoring BeansIf you are working on a bean in the BeanBox, you can save its state and then later restore that bean's state (even from within a different BeanBox session). The BeanBox uses Java Object Serialization to save and restore the state of a bean (Note that this means that if a bean is not serializable, either directly, or via fields that it contains, then a save operation will fail.) Saving a Bean's StateTo save a bean's state from within the BeanBox:
Restoring a Bean's StateTo restore a bean's state from within the BeanBox:
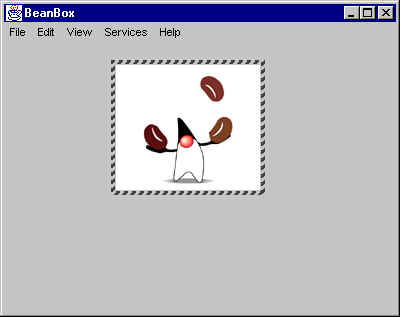
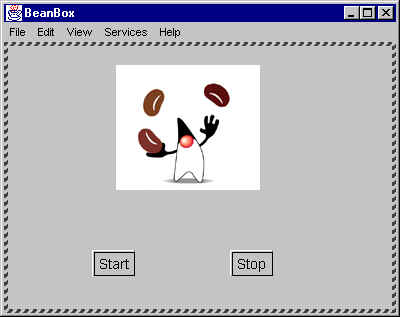
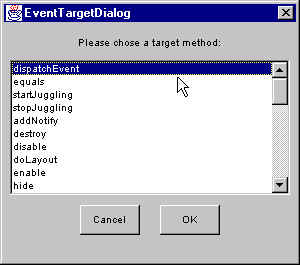
Building a Simple Application Using the BeanBoxThe standard demo of how to use the BeanBox to build a simple application is to use the "Juggler" Bean, which depicts Java's mascot, Duke, juggling a number of jelly beans. Here's what we do:
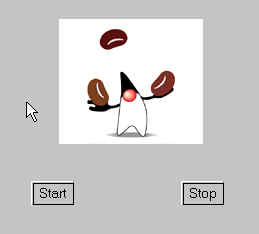
Now, you should have a simple application that starts the juggler when you click on the Start button, and stops it when you click on the Stop button. It should look something like: The above is a live applet. It should look something like the following image:
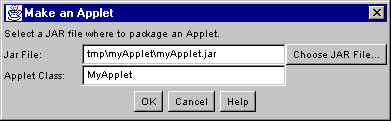
If you can't see the applet, then try to upgrade your browser to see whether that's the problem. Using The BeanBox to Generate an AppletIn fact, I used the BeanBox to generate the above applet -- I did not write one line of code! To have the BeanBox generate an applet, you do the following:
The BeanBox in BDK 1.0 will do the following:
|
| The page was last updated February 19, 2008 |