|
|
|
Here's a quick tutorial on how to create a project in the Code::Blocks Interactive Development Environment (IDE). Creating a New ProjectLet's say you're starting out to work on the first assignment for the course. It makes sense to create a project for this purpose. So let's see how we can create a project to satisfy our needs. First, run Code::Blocks on your PC. After it has shown a "splash screen", you should then see something like the following:
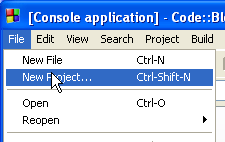
(It will probably be larger; I've reduced the size of the window to make the images in this web page more reasonable to view.) Now, click on the File->New... menu item:
This will bring up a dialog that looks as follows:
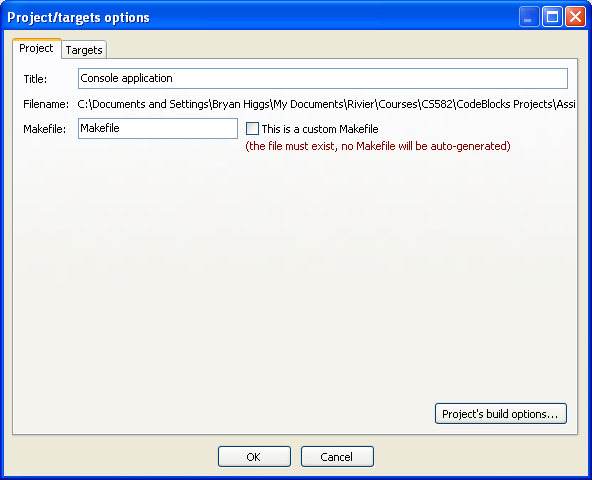
You must select You
will see that, when you select When you
finally click on the Note: If you don't choose a separate subfolder for each project, you'll likely run into filename conflicts, such as multiple copies of main.cpp files, etc. On a college PC, you will need to ensure that the top level directory/folder for all your Code::Blocks projects is somewhere on your P: drive -- something like: P:\MyCodeBlocksProjects\ Naturally, once you've set up the top level Code::Blocks projects folder, all you have to do when you create a new project (perhaps for assignment 2, etc.) is to navigate to that top level folder, and create a new subfolder for the new project. Once you've completed the creation of your project, you should now see something like the following in your main Code::Blocks window:
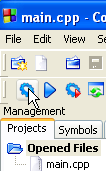
where you can see that something new has been introduced, on
the left-hand side, under Compiling, Linking & Running your ProgramLet's go ahead and build this project, to see what it can do for us, so far. So, click on the Toolbar icon:
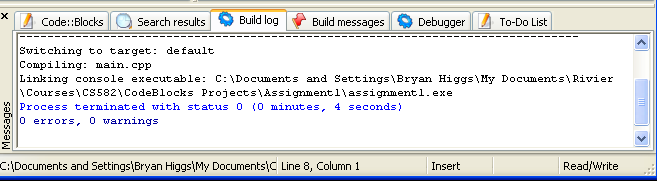
You should see the following appear in the bottom pane of the IDE:
which indicates that the main.cpp file was compiled and linked successfully. Now, we can run the program. To do this, click on the toolbar icon:
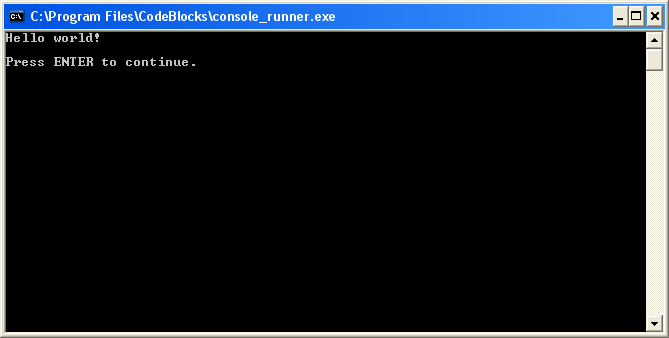
This causes the following console window to come up:
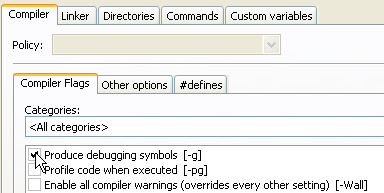
which shows that the program run successfully, output 'Hello world!', and then prompts the use to press Enter to continue. It does this, so you can view the results before the window disappears. Project SettingsBefore continuing, I strongly recommend the following:
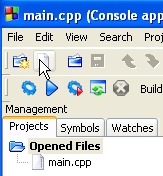
Adding Files to Your ProjectAdding files to your project is pretty straightforward. First, click on the toolbar icon:
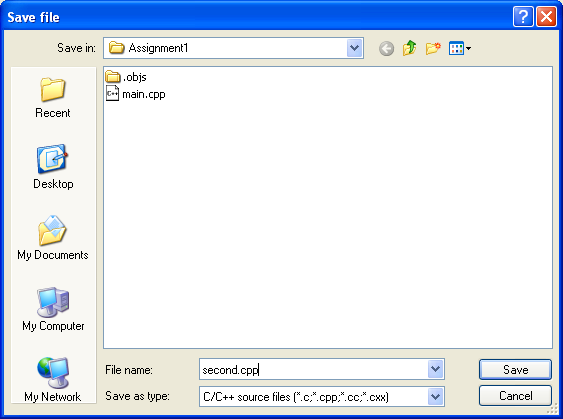
which should display a dialog something like the following:
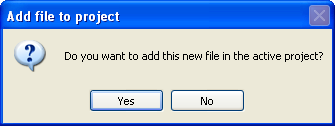
Note that I've entered a file name, second.cpp, and selected a choice in Now click on the Save button. This will cause the file to be created in the specified directory/folder, and will cause Code::Blocks to ask:
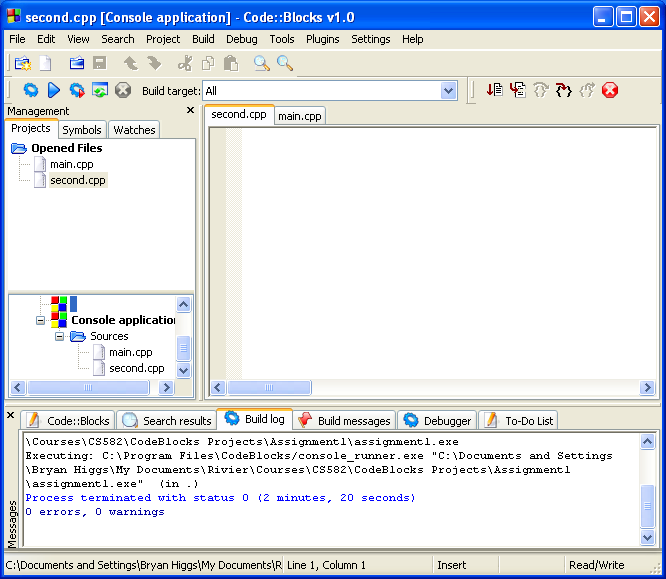
Click on the Yes button, and you should see something like the following in the main Code::Blocks window:
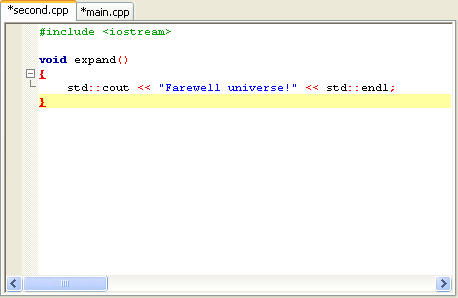
where you can see that the file has been added to the project, and I have opened the file in the editor pane. Now, let's add some code. In the following, you can see that I've added some code to the new file:
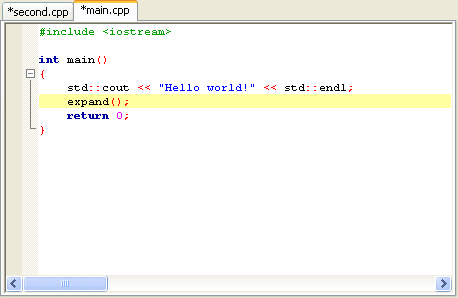
and also to the main.cpp file:
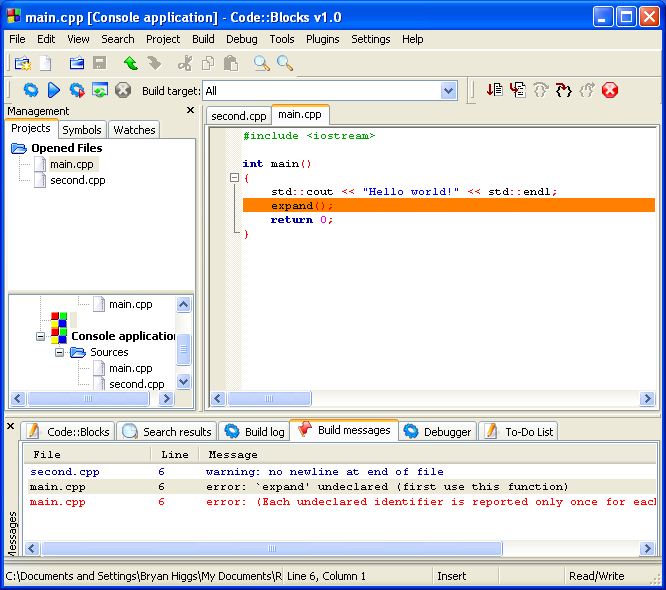
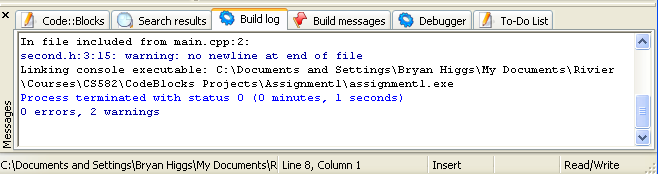
So let's build the project again, and see what happens! Here's the results:
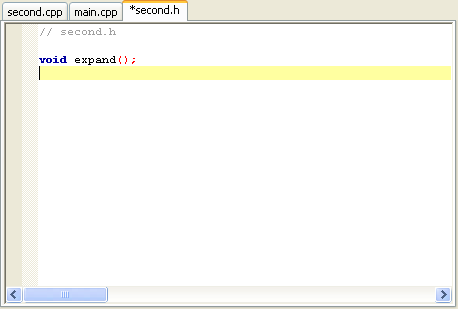
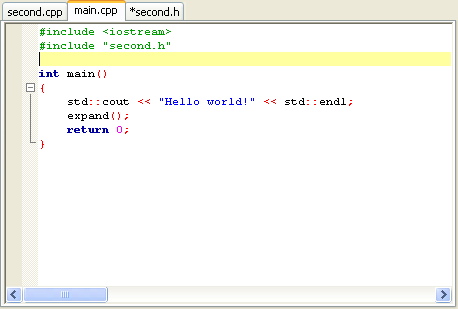
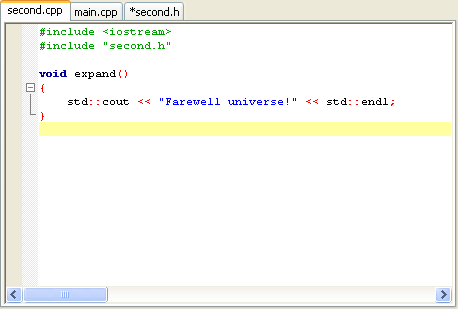
Clearly, we have some problems. To fix the problems, I did the following:
This time, it builds correctly:
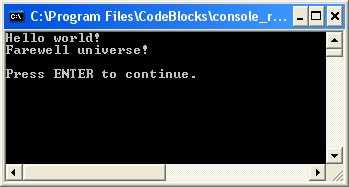
and runs correctly, too:
Note: Although you can (and in most non-trivial cases, should)
have multiple C/C++ source files in a project, you can only have a single main
entry point. If you try to have multiple sources, with more than a
single main entry point, you will get errors at the link stage.
I have a couple of observations regarding this:
For the assignments in this course, I recommend you place each assignment in its own separate project, and that each such project should be placed in a separate subdirectory/folder. |
| This page was last changed on 16 Jan 2006 |